
During the First World War, Germany deployed a fleet of 351 unterseeboote, or simply known as U-boats, to terrorize and sink Allied ships. Although the U-boats didn’t have much success against nimble British warships, but the merchant vessels and civilian ships were torpedoed.
The sinking of the R.M.S. Lusitania, a civilian vessel, caused the United States of America to join the war on the side of the Allies.
Control room looking aft, starboard side. The manhole to the periscope well and various valve wheels for flooding and blowing are visible.
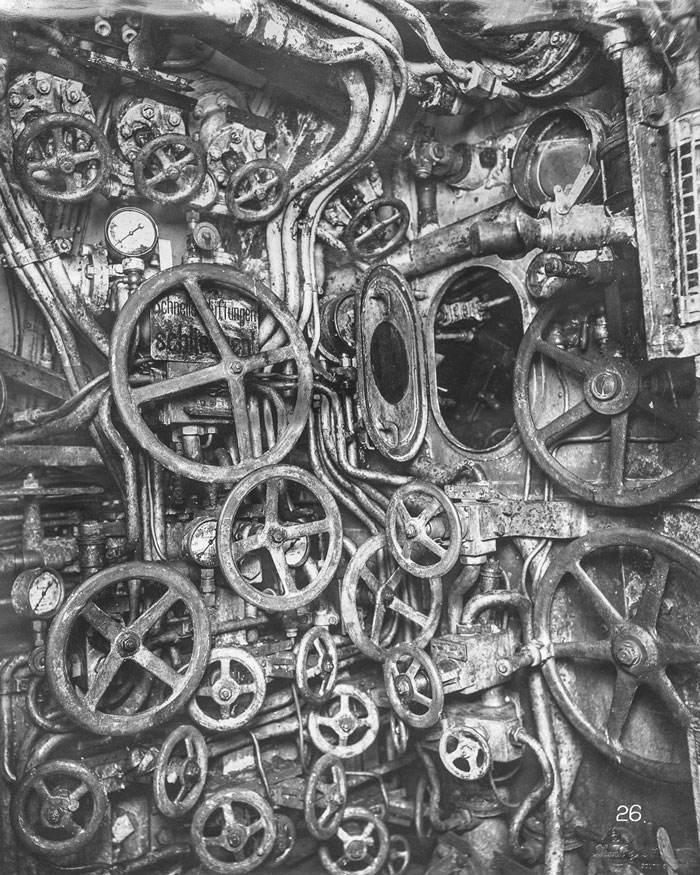
IMAGE: TYNE & WEAR ARCHIVES & MUSEUMS
On July 19, 1918, the twin-screw U-boat 110 was attacking a merchant vessel convoy in the North Sea off the town of Hartlepool when she was forced to the surface by Allied depth charges. She was then rammed and sunk by the H.M.S. Garry, a torpedo boat destroyer.
It was later salvaged and placed in the Wallsend dry docks of Swan Hunter Wigham Richardson Ltd. in England, with orders to restore her to working condition.
Photos were taken of the cramped and complex interior of the U-boat.
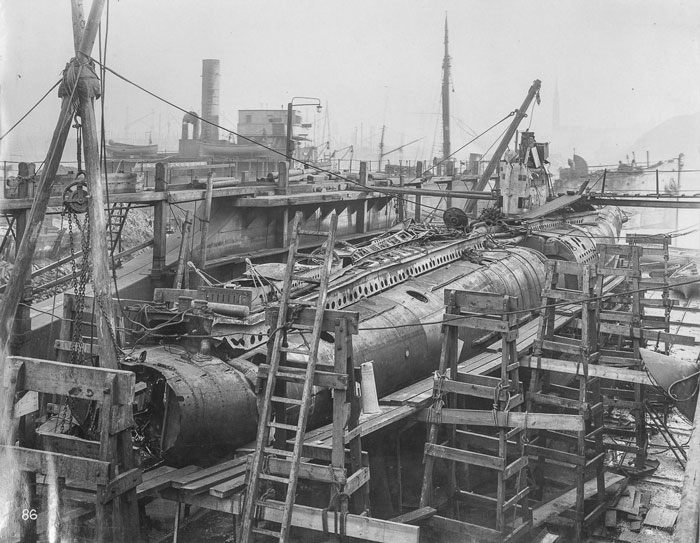
IMAGE: TYNE & WEAR ARCHIVES & MUSEUMS
U.B. 110 in dry dock.
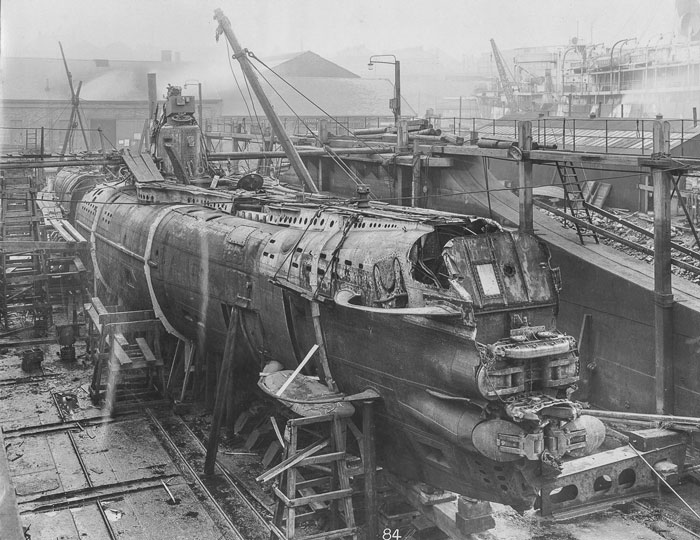
IMAGE: TYNE & WEAR ARCHIVES & MUSEUMS
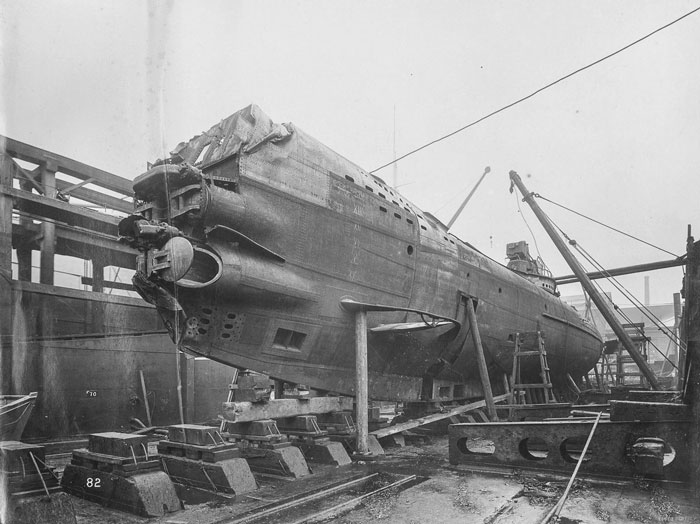
IMAGE: TYNE & WEAR ARCHIVES & MUSEUMS
Electric control room.
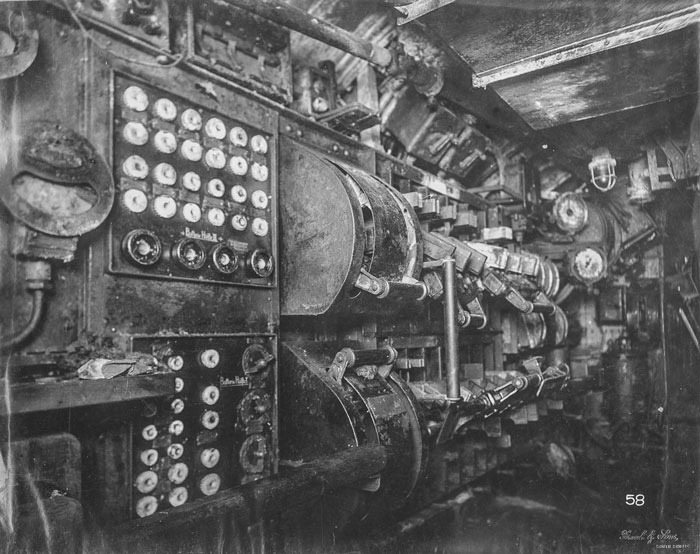
IMAGE: TYNE & WEAR ARCHIVES & MUSEUMS
Electric control room, looking aft to port.
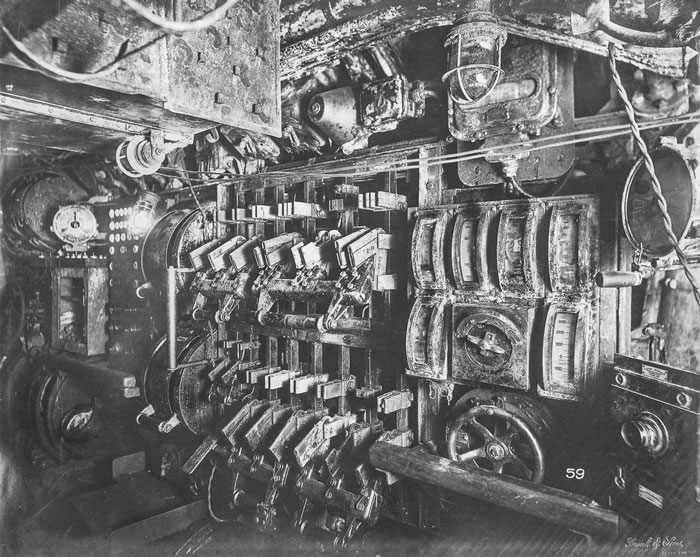
IMAGE: TYNE & WEAR ARCHIVES & MUSEUMS
Aft torpedo room.
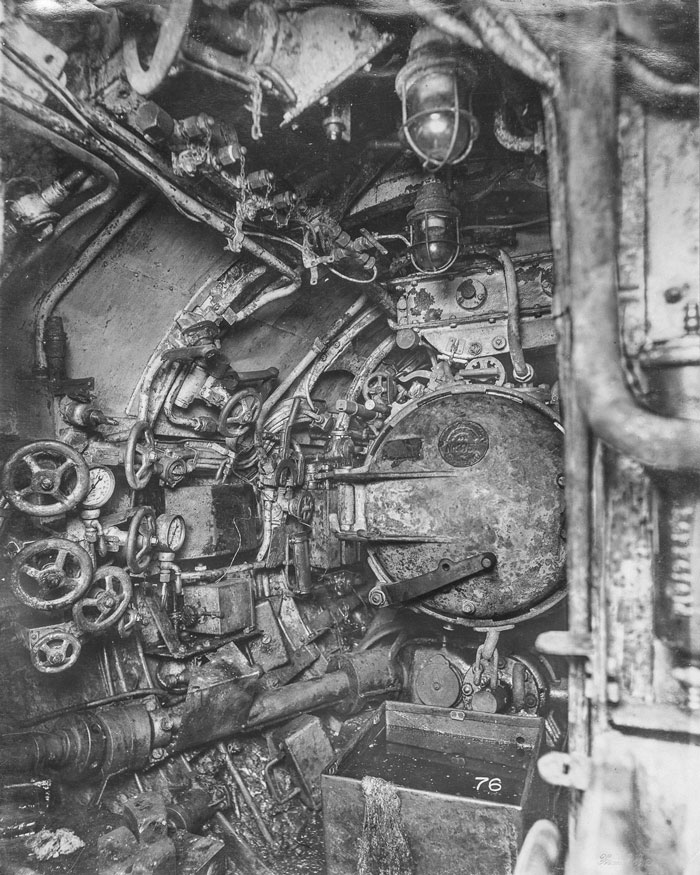
IMAGE: TYNE & WEAR ARCHIVES & MUSEUMS
Engine room, looking forward on starboard side.
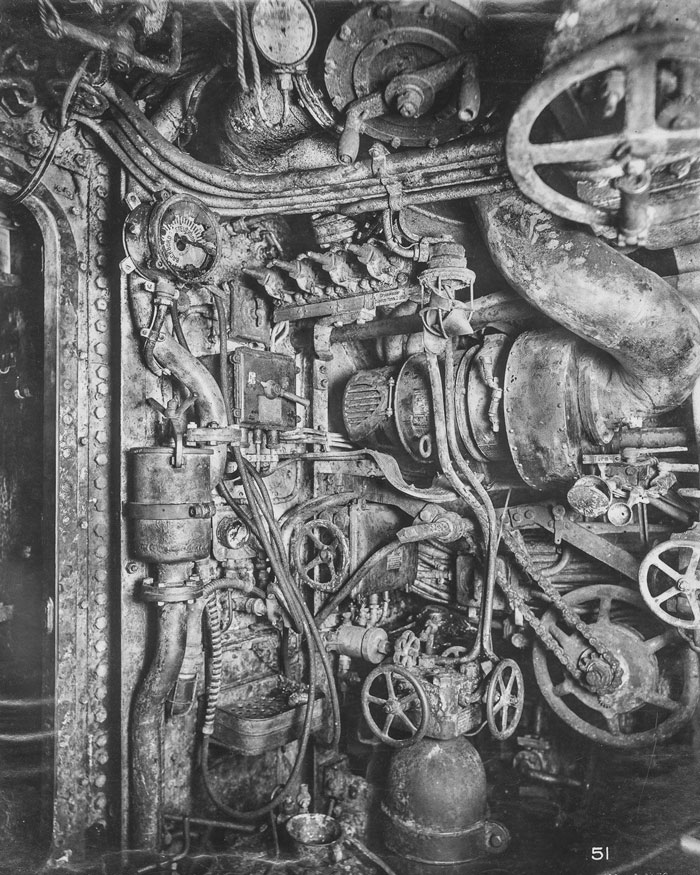
IMAGE: TYNE & WEAR ARCHIVES & MUSEUMS
Electric control room, looking forward.
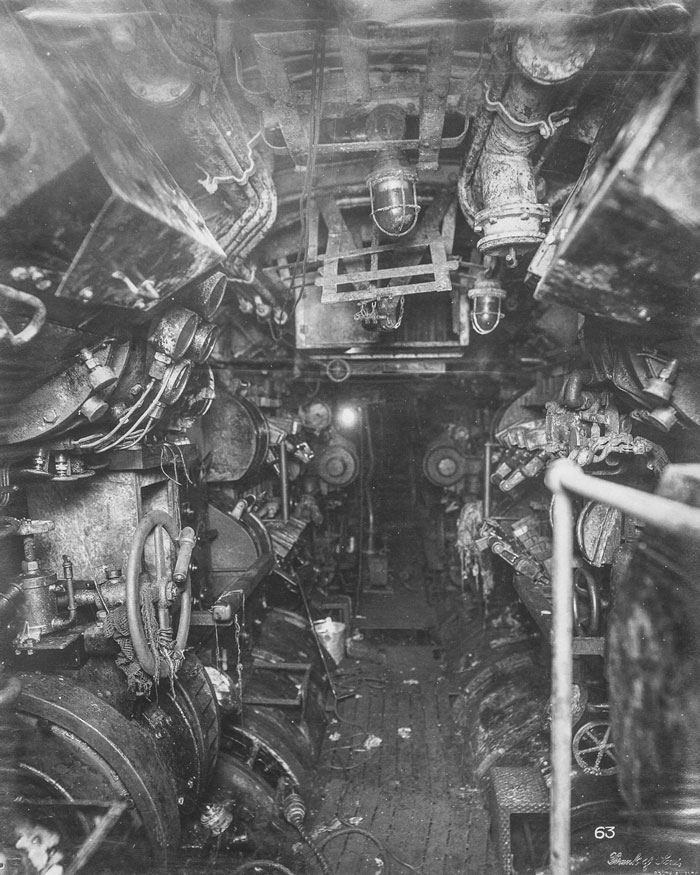
IMAGE: TYNE & WEAR ARCHIVES & MUSEUMS
Control room looking forward. Hydroplane gear, depth and fuel gauges are visible.
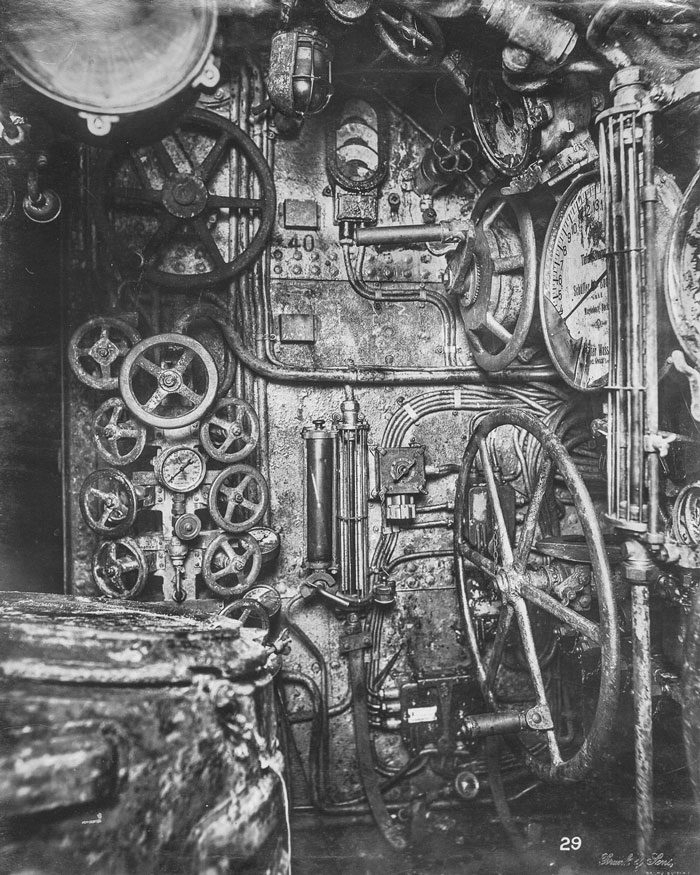
IMAGE: TYNE & WEAR ARCHIVES & MUSEUMS
Mess table and lockers.
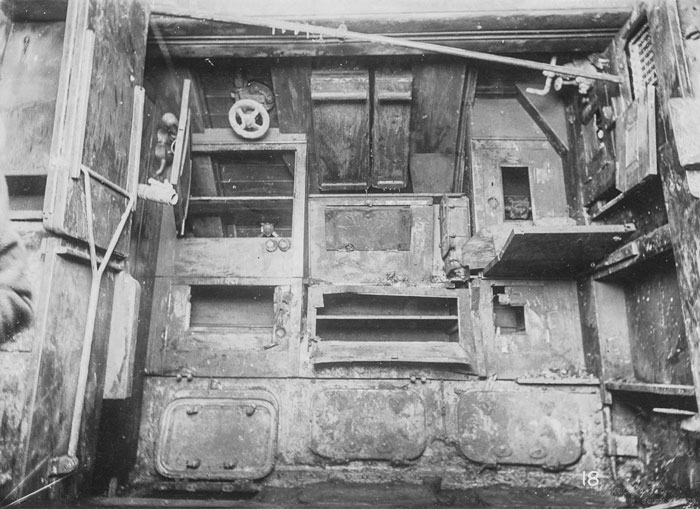
IMAGE: TYNE & WEAR ARCHIVES & MUSEUMS
Third compartment, crew’s lockers.
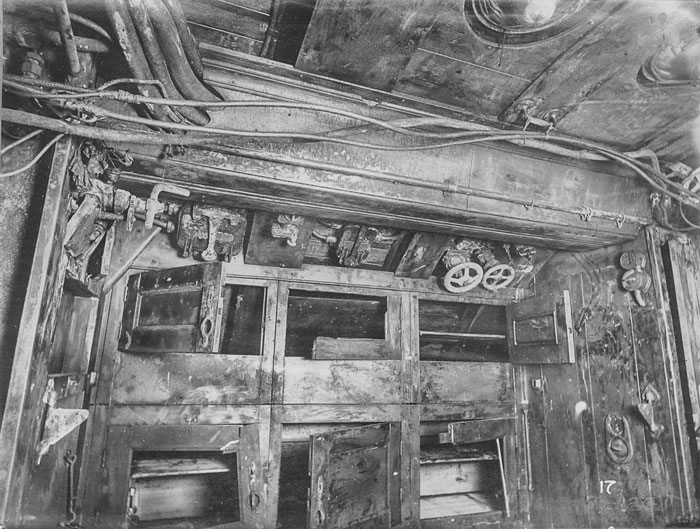
IMAGE: TYNE & WEAR ARCHIVES & MUSEUMS
Forward torpedo room.
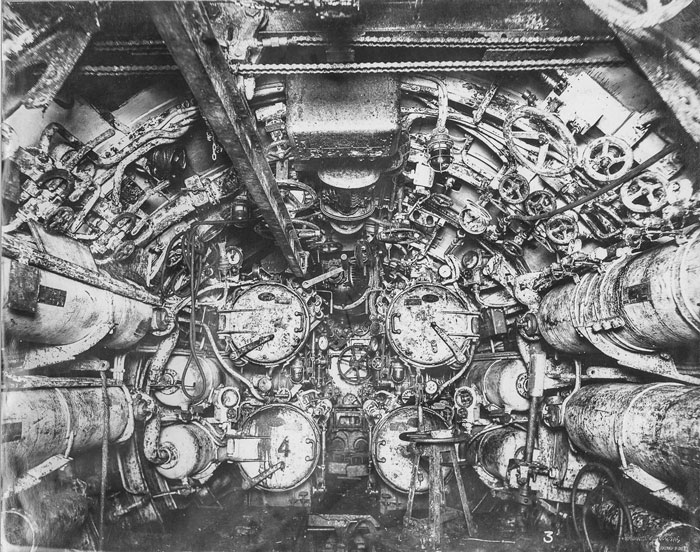
IMAGE: TYNE & WEAR ARCHIVES & MUSEUMS
The four torpedo tubes.
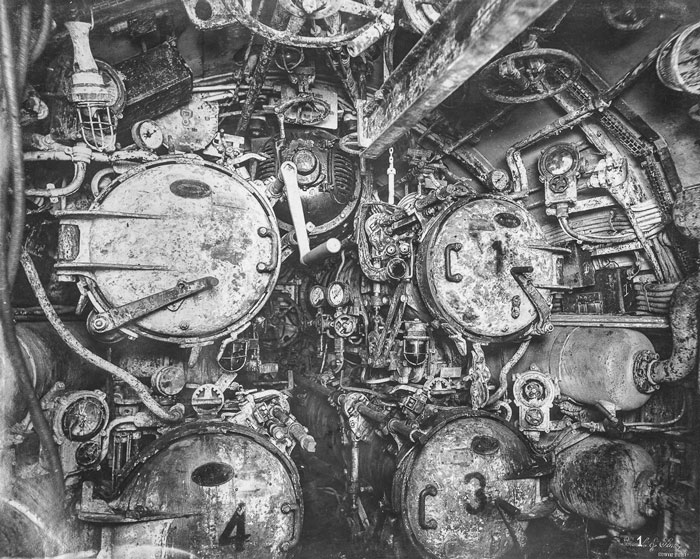
IMAGE: TYNE & WEAR ARCHIVES & MUSEUMS
Torpedo room looking aft. The beam for lifting torpedoes into place is overhead.
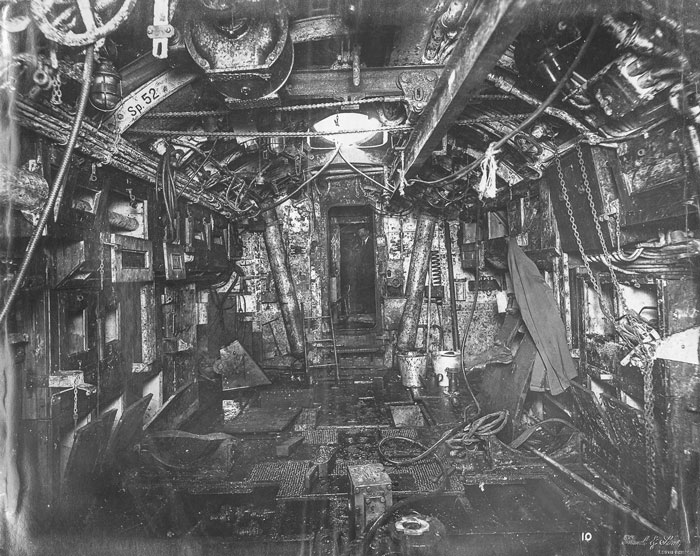
IMAGE: TYNE & WEAR ARCHIVES & MUSEUMS
Electric control room, looking aft to motor room and stern torpedo room.
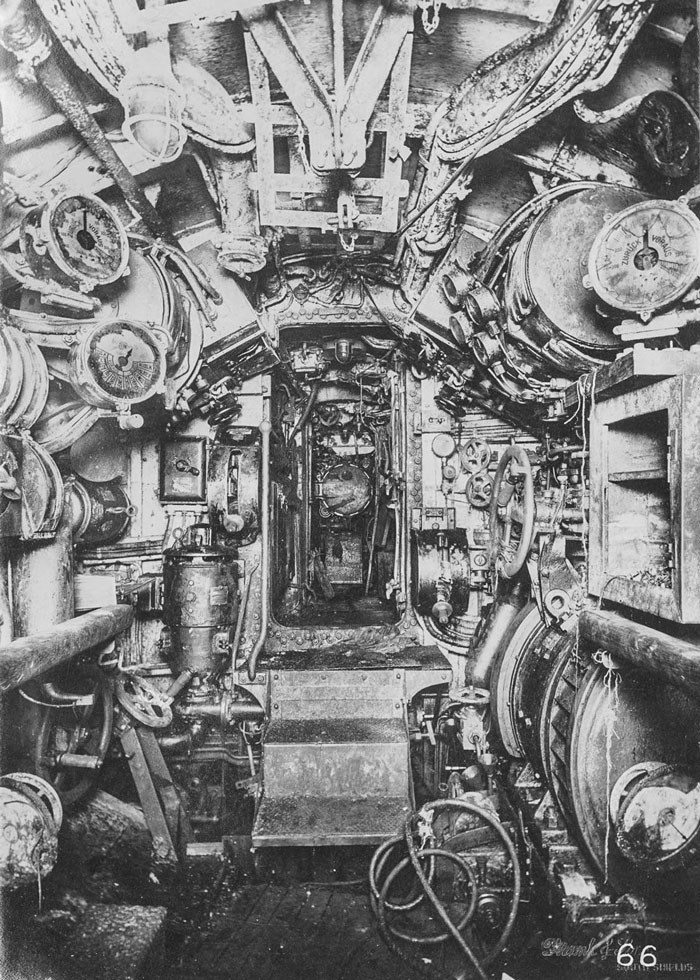
IMAGE: TYNE & WEAR ARCHIVES & MUSEUMS
Number 6 compartment with sleeping berths.
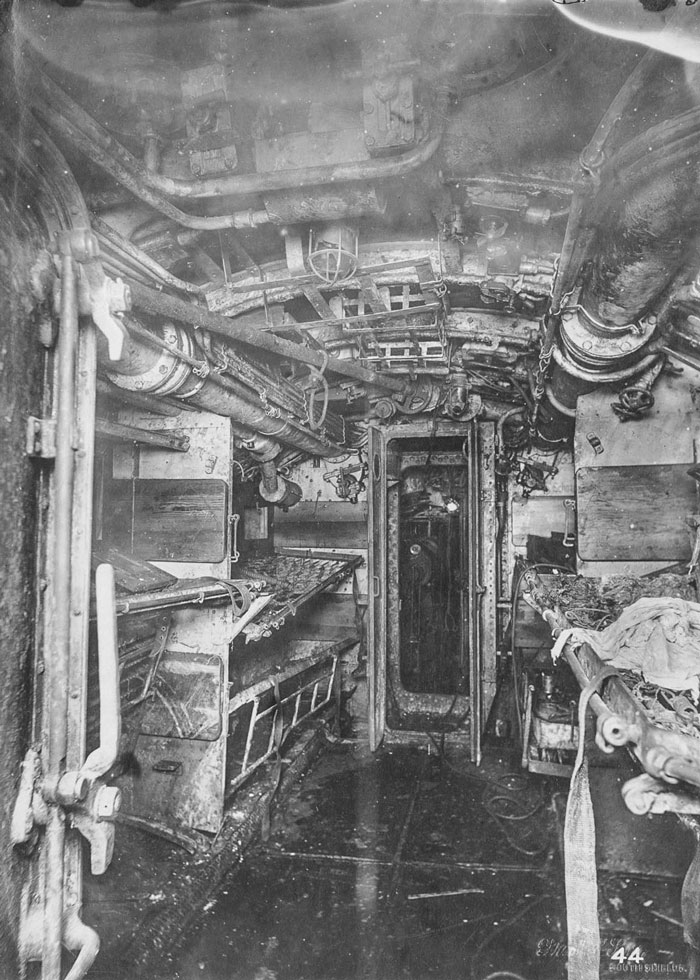
IMAGE: TYNE & WEAR ARCHIVES & MUSEUMS
Number 5 compartment, starboard side.
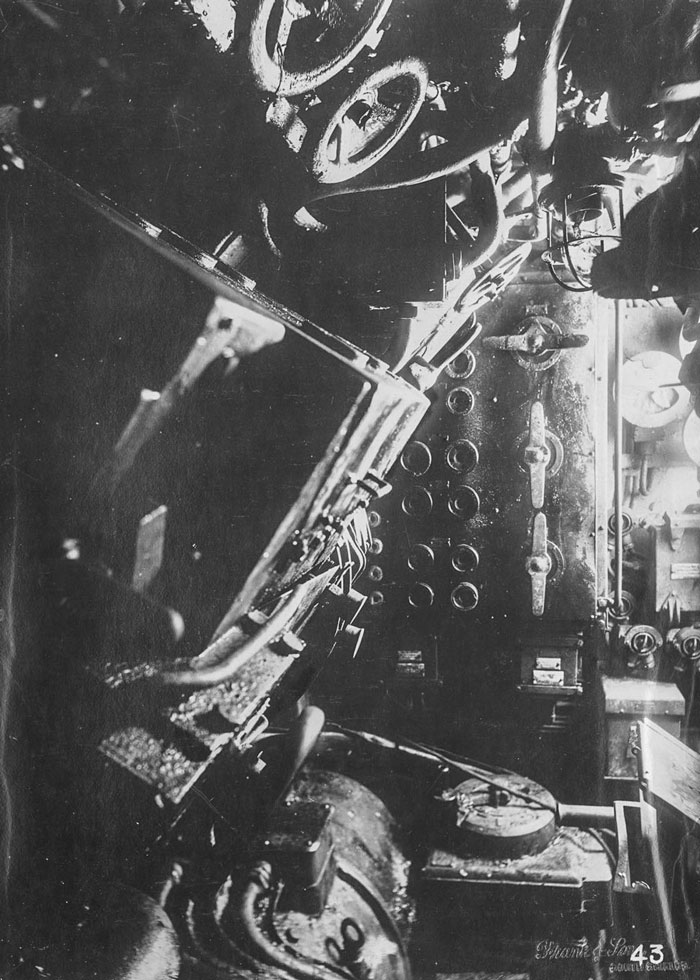
IMAGE: TYNE & WEAR ARCHIVES & MUSEUMS
Crew space.
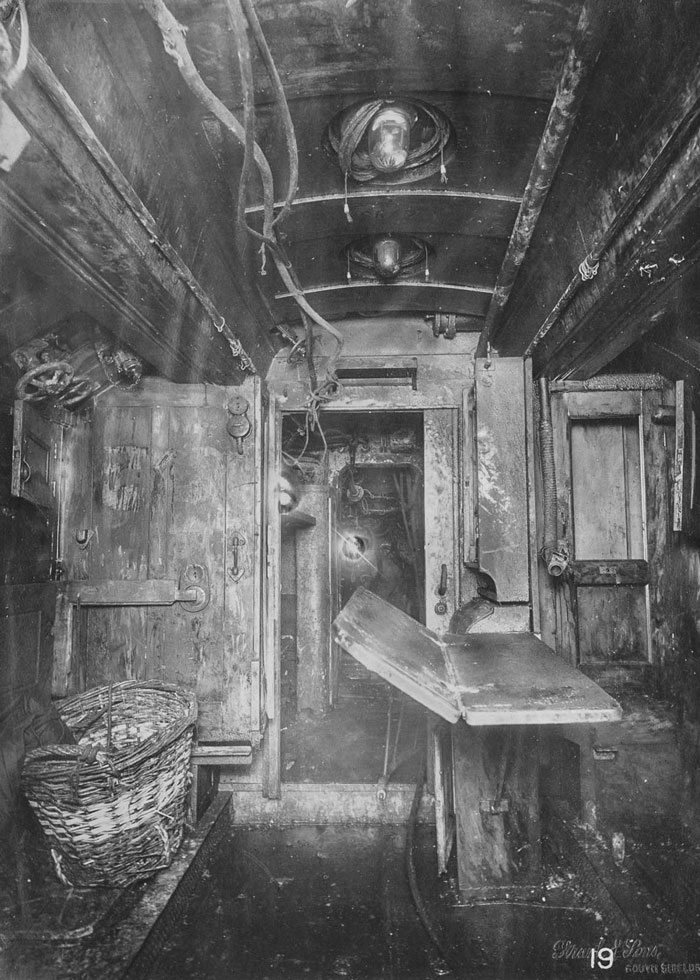
IMAGE: TYNE & WEAR ARCHIVES & MUSEUMS
Control room looking aft. Wheels for raising and lowering the periscope are visible.
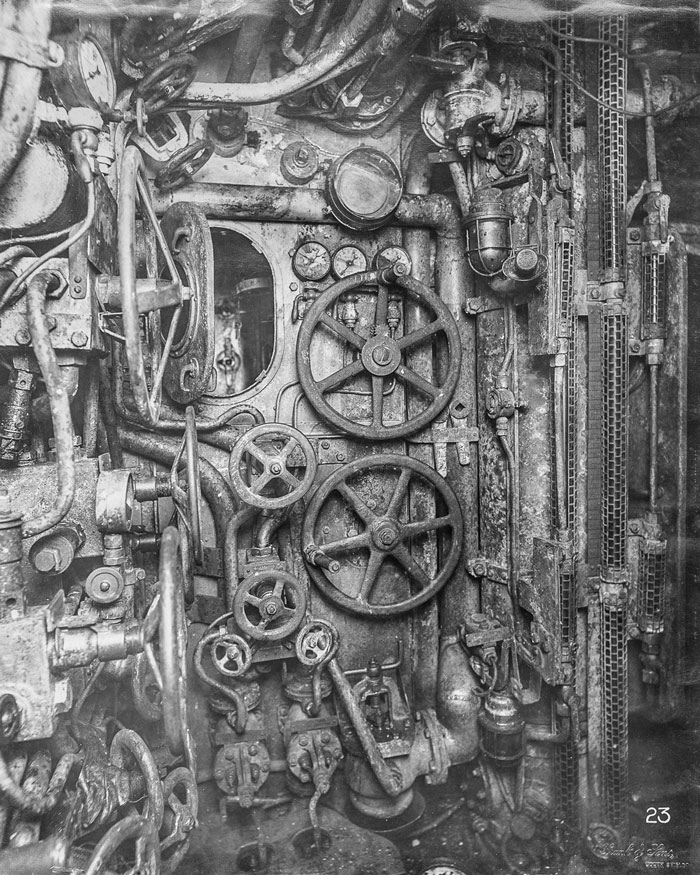
IMAGE: TYNE & WEAR ARCHIVES & MUSEUMS
Control room looking forward. The depth gauge, engine telegraphs, wheels for flooding and blowing, and hydroplane controls are visible.
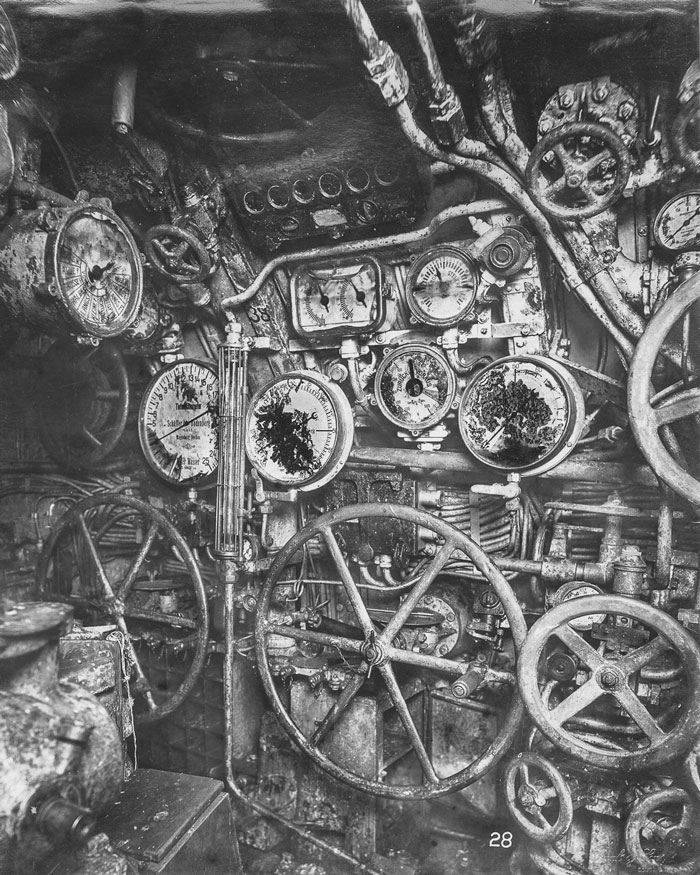
IMAGE: TYNE & WEAR ARCHIVES & MUSEUMS
Control room looking forward to port. Wheels to control air temperature and pressure are visible.
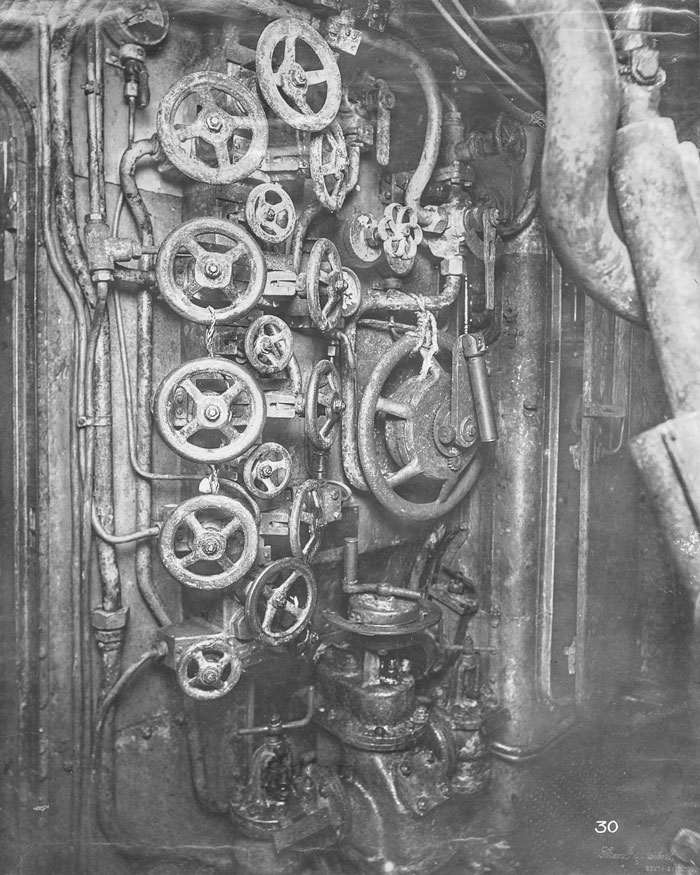
IMAGE: TYNE & WEAR ARCHIVES & MUSEUMS
Forward torpedo room.
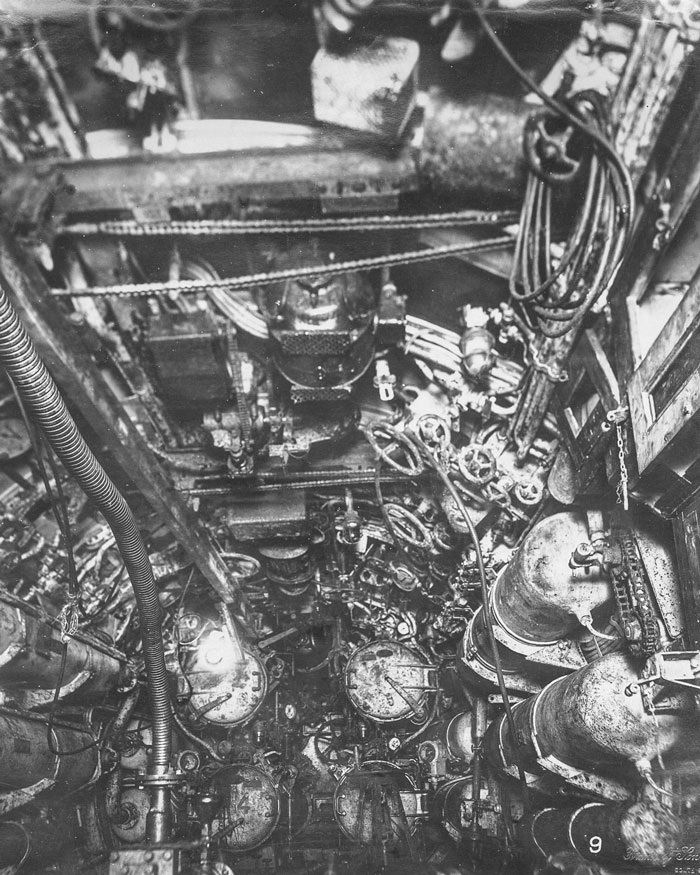
IMAGE: TYNE & WEAR ARCHIVES & MUSEUMS
Control room. The gyro compass, steering control shaft, engine telegraphs and voice pipes are visible.

IMAGE: TYNE & WEAR ARCHIVES & MUSEUMS
Diesel engine room.
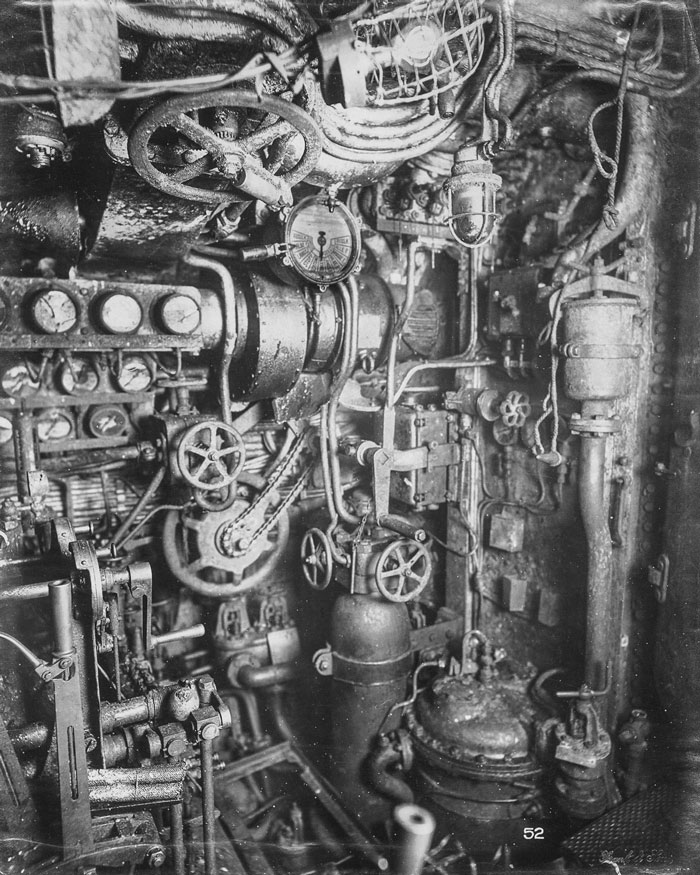
IMAGE: TYNE & WEAR ARCHIVES & MUSEUMS
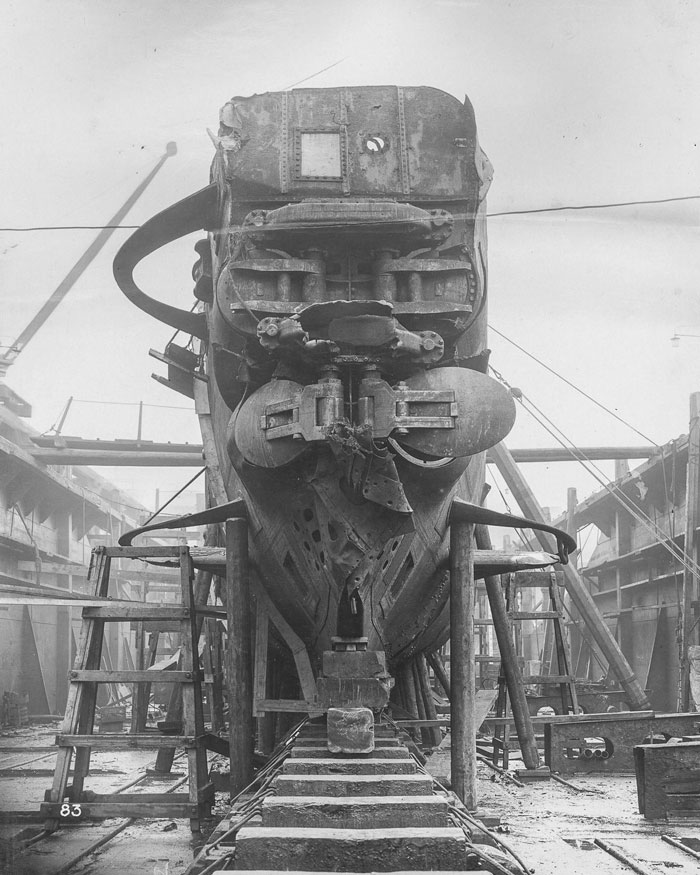
IMAGE: TYNE & WEAR ARCHIVES & MUSEUMS